How to sew bra cups | Making my own wedding dress
This is actually still a secret, but since none of my friends or family will probably read this any time soon I’m cool with telling you guys (the invisible internet people): I’m getting married next year! I’m saying it like it was a surpise, but my boyfriend and I have both known from each other we’d like to get married some day for a long time. Now that I have a job, we can actually pay for the wedding we want. (In about a year, that is.)
So with wedding plans come wedding projets. And the most important thing for many girls at their wedding is the dress. Will it be princess-like? Or more bohemian? (I’m still not sure what that even means.) Or will you go for the dress-pants suit like this one from Chanel? Whether you’re going for big puffy sleeves or no sleeves at all, choices will have to be made. And I want to make alllll the choices. (I’m actually really bad at making choices, but I’m also too picky to just buy a dress from the store.) So I decided to make my own wedding dress.
Choices will have to be made
I’ve never sewn a piece of clothing before that has to be worn at something so… official. Or even something I’d wear to work. I’ve only made costumes and tiny clothes for dolls. So this is a big project for me. Thank god I’ve got a full year to work on it.
After Pinteresting for a few weeks to see what I’d like to wear when I’m saying the “I do” (or just “Ja” as we like to say in dutch), I decided to just pick a dress bodice style first. I tend to change my mind a lot, so this would keep the options open a bit. I really like the sweetheart neckline style, but I want to be able to dance a bit (and maybe jump on a bouncing castle?) at my wedding so I do like straps on the bodice.
I bought this pattern from Etsy (Strapless top from craftyalexshop), because I thought: It’s my wedding so I can spend some money to make things easier for a change. Right?
Most patterns need some altering after trying them for the first time (or at least in my experience) and this one was no different. I’ll talk about the bodice shape in another post, I’m just going to skip to the bra cups now. Because I soon noticed that the fabric I’d bought for my dress (a cotton viscose blend) would be too thin for this style. The old sheet I used with the same fabric texture looked a bit sad and saggy on my duct tape mannequin. So I decided I’d add some structure to it with corset boning and sewn in bra cups.
At the moment I’ve only made a try-out version of the finished (but conceptual) cup into the bodice mockup, but I can already see this is probably a good solution for the sagginess. Am I a fortuneteller? Maybe. (But probably not, as you’ll soon see.) I’ll talk about the boning in another post in the future, once I’ve figured that one out.
Back to the bra.
Not wanting to spend a lot of money on ready made bra cups just to – probably – screw up the first few times, I decided on making my own bra cups to practise with. I made them with regular craft foam, just a few millimetres thickness. Since they’ll eventually be sewn into the bodice behind the lining, it doesn’t really matter that the craft foam gets quite sweaty after wearing it against your body for a while. If you’re planning on wearing the bra cups directly against your body (like many sewn-in bra cups for wedding dresses) you might want to go for a more skin-friendly kind of foam. Or just buy the pre-made ones. (But that’s probably not why you’re here.)
The project
To make bra cups you’ll need about an A4 size sheet of craft foam. Go for a pack of 10 or something, so you can make a few and adjust the pattern along the way. Craft foam usually isn’t that expensive. Other than that you’ll need some scissors, duct tape, a bra that fits you well, a pen, some pins and a pen or marker to trace your patterns with.
Supplies and tools
- Craft foam
- Well-fitted bra to trace
- Scissors
- Duct tape
- Pins
- Pen or marker
To make bra cups you’ll need about an A4 size sheet of craft foam. Go for a pack of 10 or something, so you can make a few and adjust the pattern along the way. Craft foam usually isn’t that expensive. Other than that you’ll need some scissors, duct tape, a bra that fits you well, some pins and a pen or marker to trace your patterns with.

Step 1: A duct taped bra
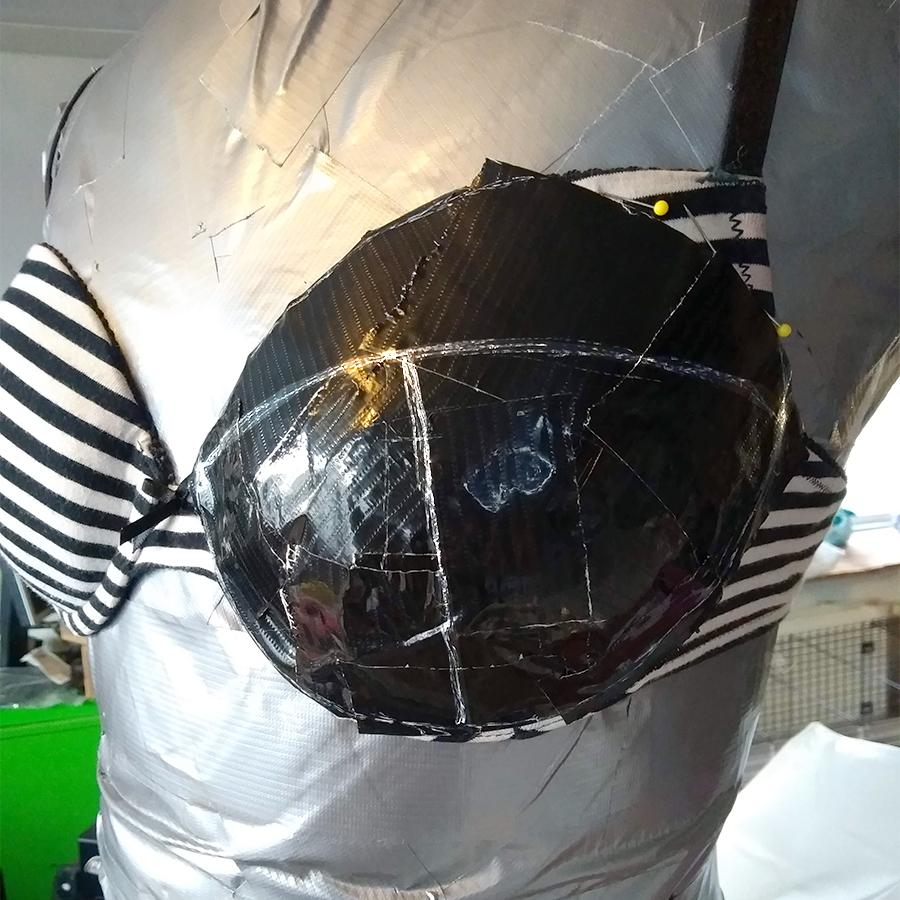
Take your well-fitting bra and place it somewhere you can easily tape some duct tape on it, without the garment losing its shape. I put mine on the duct tape mannequin I made for this wedding dress project. Then figure out what shape you want the cups to be and start taping. I placed some pins on the bra as a guide for the shape. Make sure the cup is fully covered in tape.
Step 2: Drawing the pattern
Doesn’t this look kinky? I’m sure duct taped bras will some day be a thing.
Once you’ve fully covered the entire pad, you can draw the pattern shapes on it. I took some inspiration from existing bra patterns and went for this layout: A thinner longer piece for the top part and the bottom of the cup split in two: the inner part slightly smaller than the outer part.
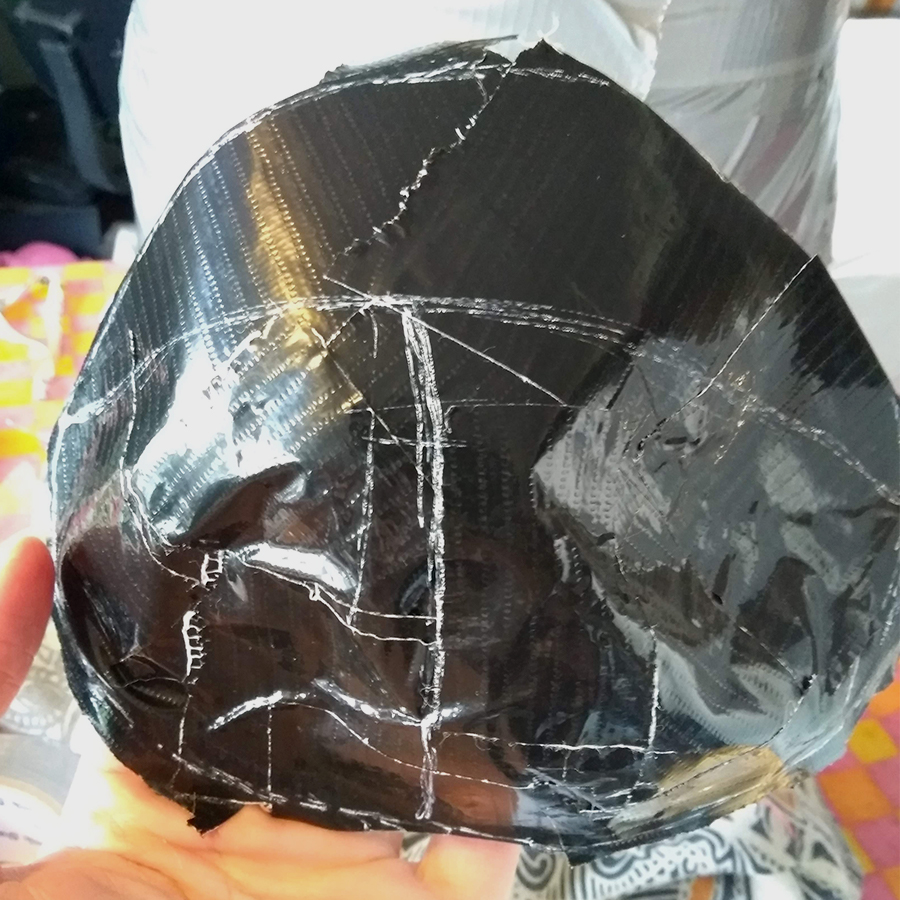
Step 3: Peeling
Now you can peel the duct tape mould off the bra. Make sure the tape overlaps enough to hold all the pieces together. It’s kinda sticky, so try not to get it to stick together, because it’s a pain to un-stick again. (It’s also really annoying to get your hair stuck to it. Just a little warning if you were thinking about using it as a hat.)
Step 4: Cutting and sticking
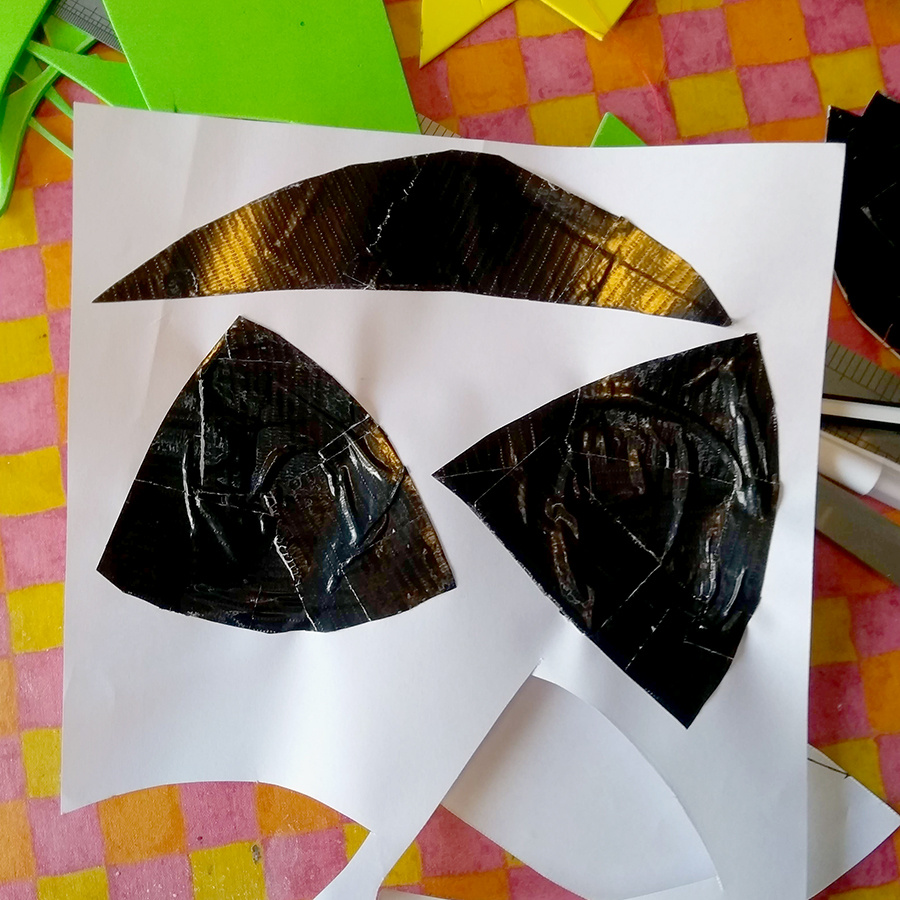
Then peel the duct tape mould off and cut along the lines you’ve just drawn. It’s easiest to start with the outlines of the cup, so the alignment of the seperate pieces is more precise. It’ll fit better when you’re sewing them back together eventually.
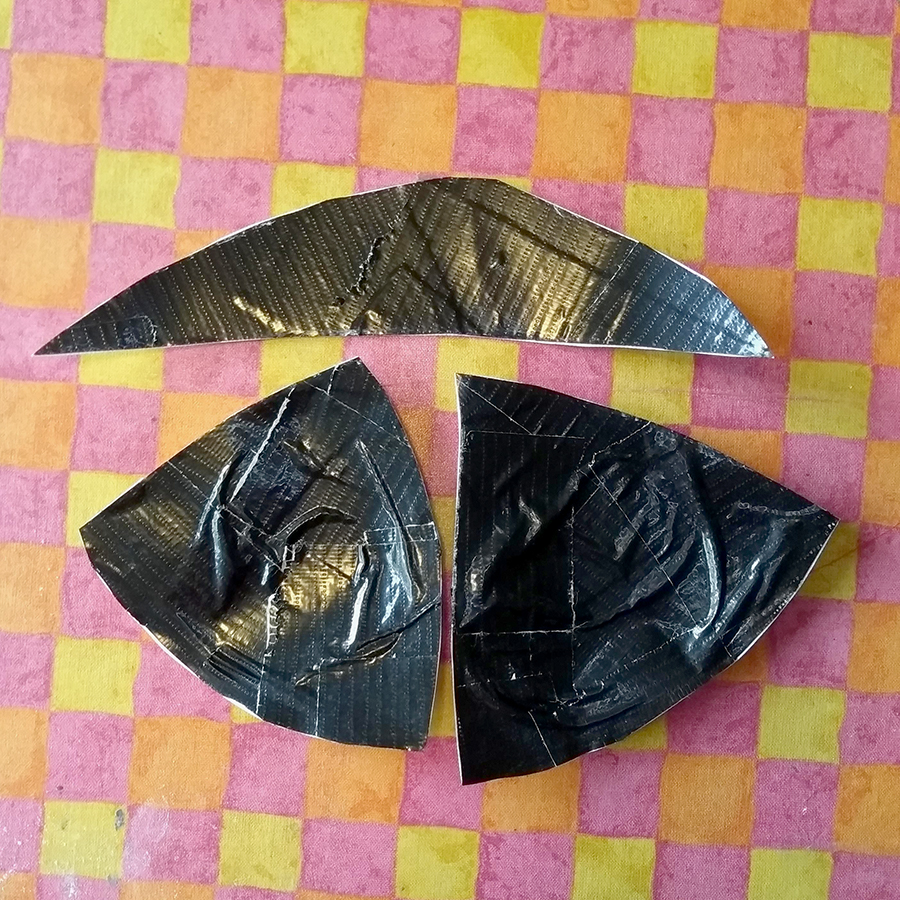
Then stick the pieces to a piece of paper, so it’s easier to work with. You’ll end up with something like in the picture. The duct tape probably won’t lie completely flat, but that’s okay. Try to get them to lay as flat as possible.
Step 5: Cutting and placing
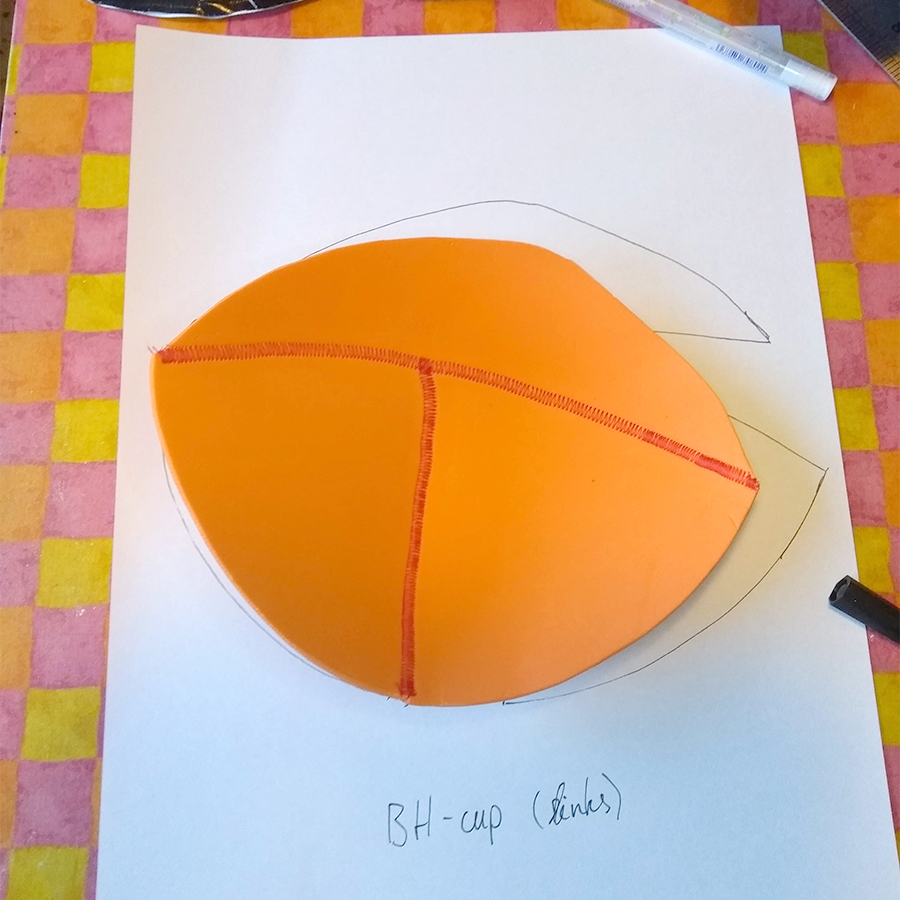
Once all this stickyness is out of the way, you can cut out the pieces again. I took a picture of the arranged pieces as a reference for when I’d need to sew the foam pieces together. This isn’t a neccesary step but it does make things easier. (You can also trace the arranged pieces on some paper or mark them on the back. I was taking pictures for this post anyway so I used the pic on the left as a reference.)
Step 6: Trace
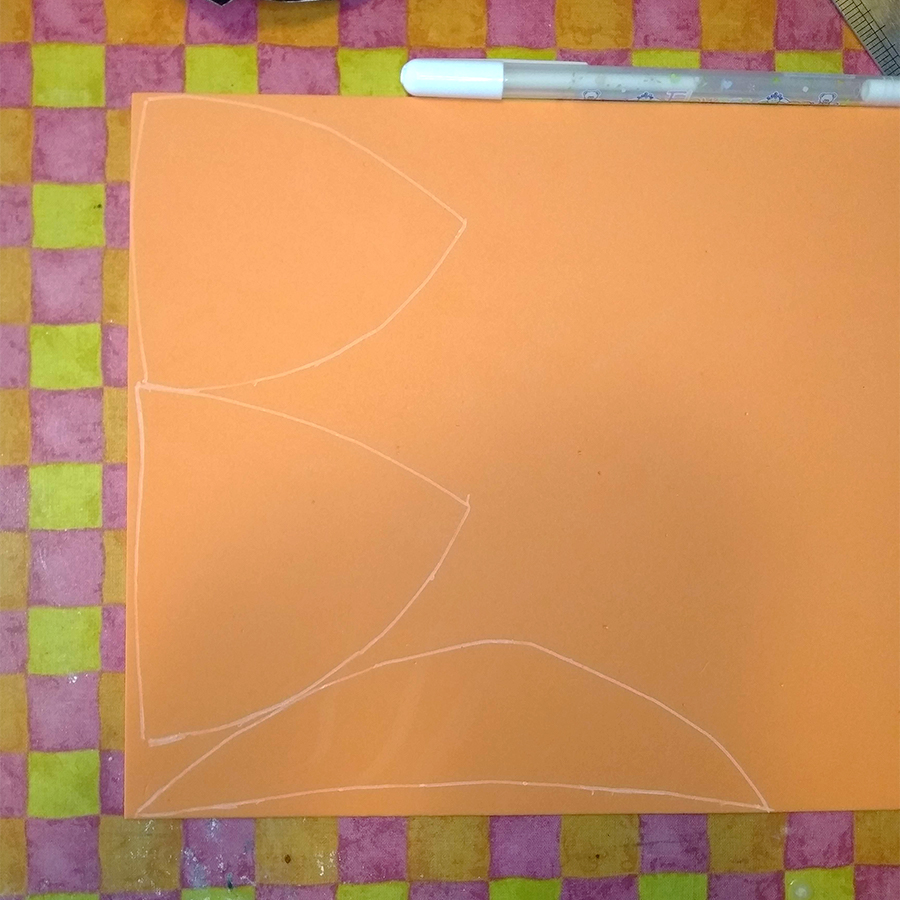
Next up: Tracing the design. Take the foam I talked about in the supplies-section and trace the three pattern pieces onto the foam. No need for seam allowance, you’ll see why.
Step 7: Sew
Time to sew! I’m sure it can be done with a regular needle and thread, old school, by hand. But using a sewing machine is just a lot easier in this case. Using a satin stitch (basically a zigzag stitch very close together) press the sides of the foam together and sew on top of it. You may need to push a little to feed the foam through the machine; mine had a little trouble getting grip on the material. I started with sewing the two bottom pieces to the upper piece and then I sewed the two bottom pieces together.
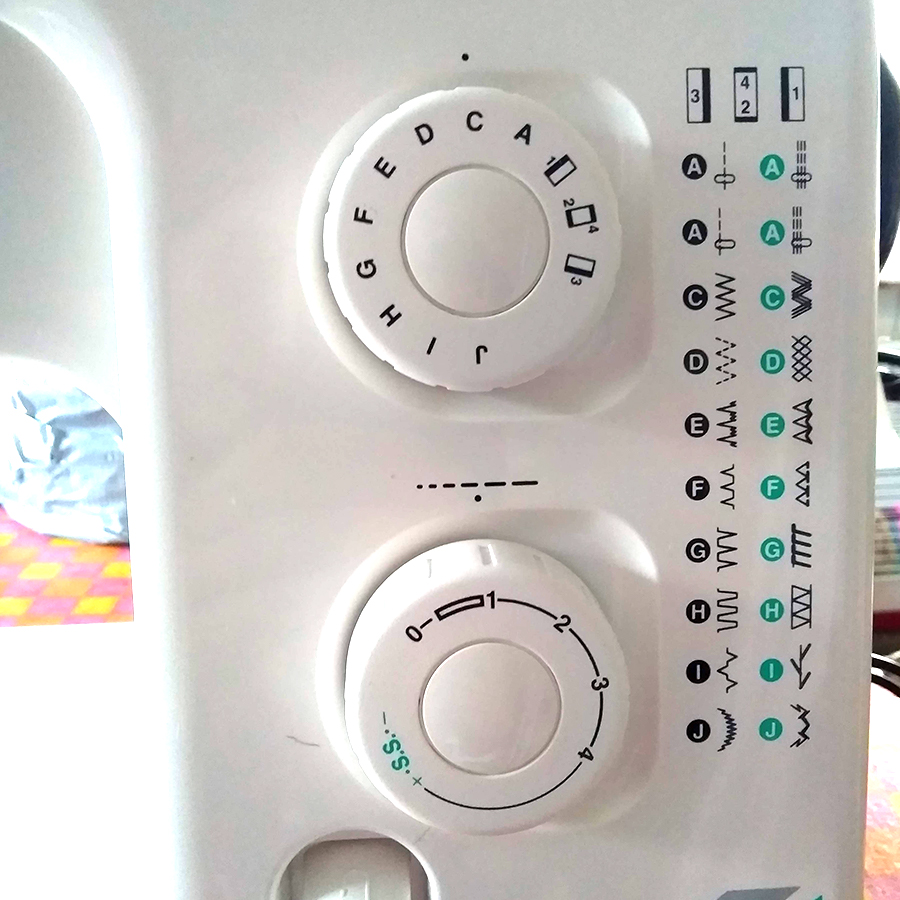
These are the settings I used with my machine. I practised a bit on a piece of scrap foam first, to see which settings gave the best results. The stitches need to be quite wide and very close together, but not too close as the foam may rip when too many needle punches are very close together.
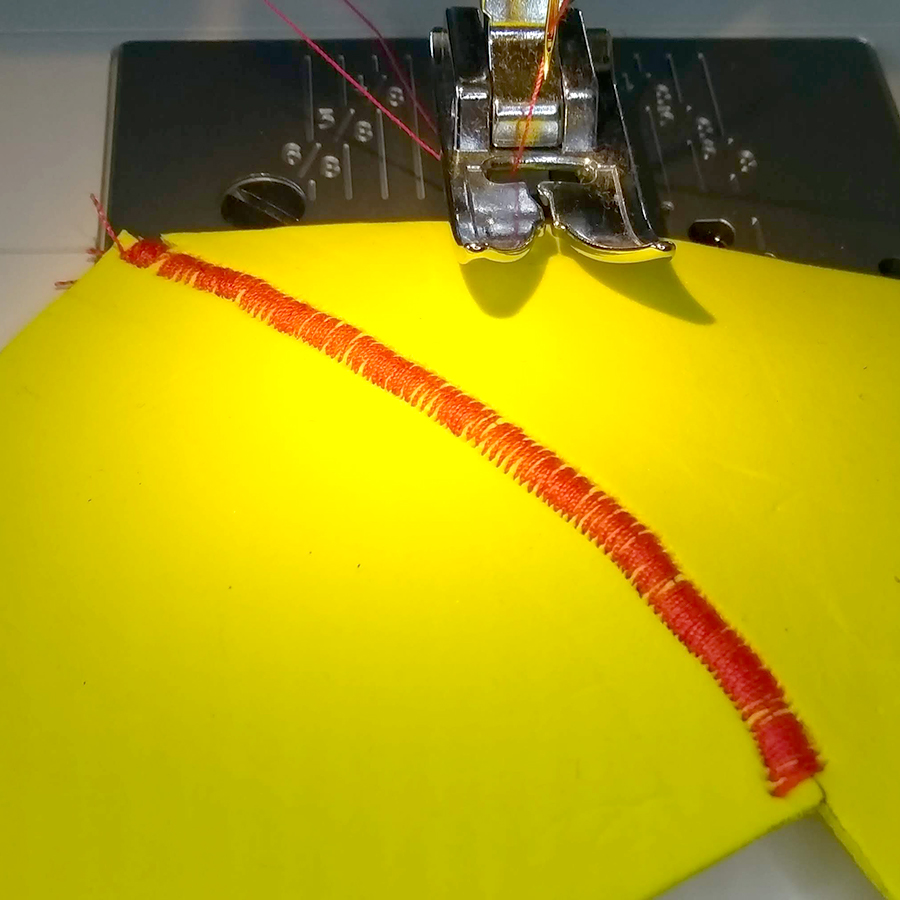
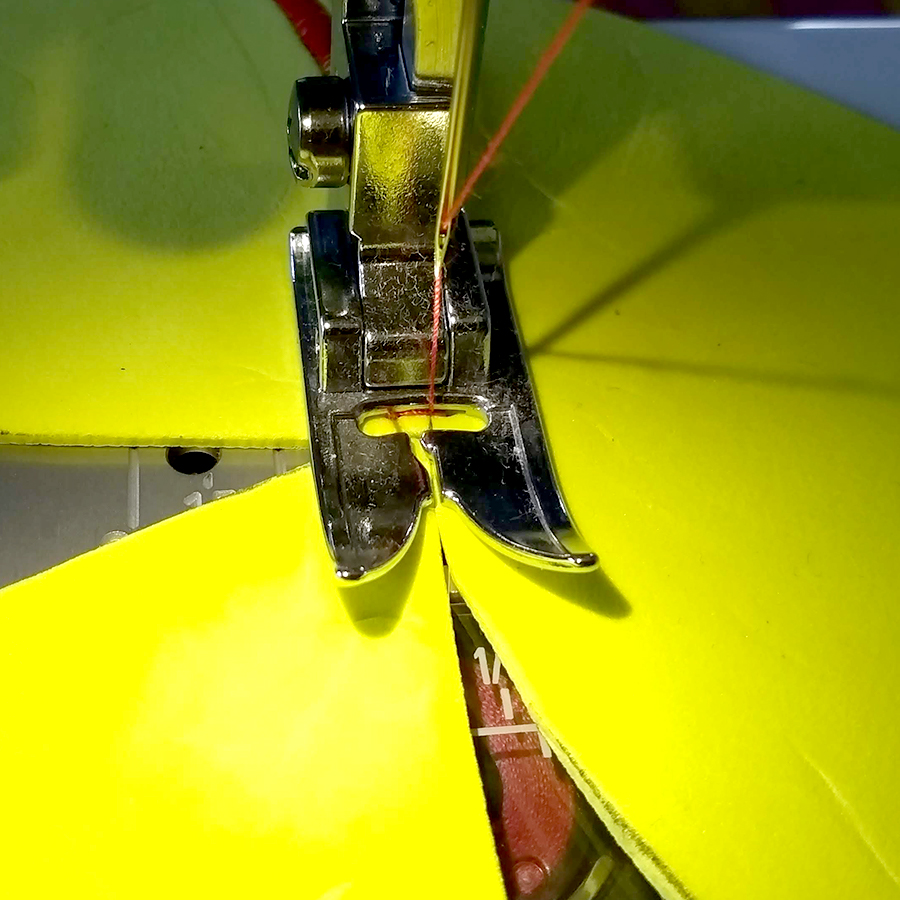
Here’s an example of the stitches I used: Close but not too close. And red, because I am a lazy person that can’t be bothered with changing thread in between projects.
(You may have noticed the foam is suddenly yellow here. That’s because this is a picture of an earlier version. Again: too lazy to take new pics.)
Step 8: Fit
Yay, almost done! You’ve now got your very own DIY foam bra cup. Time to fit!
Place the cup onto the boob you’re making it for. (Ask permission first if it’s not your own boob. I trust your relationship with your own boobs is good enough to proceed without asking for further consent.) If everything went right, you now have a finished cup!
If it doesn’t fit right just yet, try and see what’s causing the problem. Maybe you can trim the edges a bit, or shape the foam some more with your hands (use heat to make the foam more moldable, but be wary of pushing too much, the shape may get wonky if you do). If it still doesn’t fit, you probably need to make some adjustments to your pattern. I had to do so too and I took pictures of the process. So I might make a follow-up tutorial for anyone who’s interested 😀
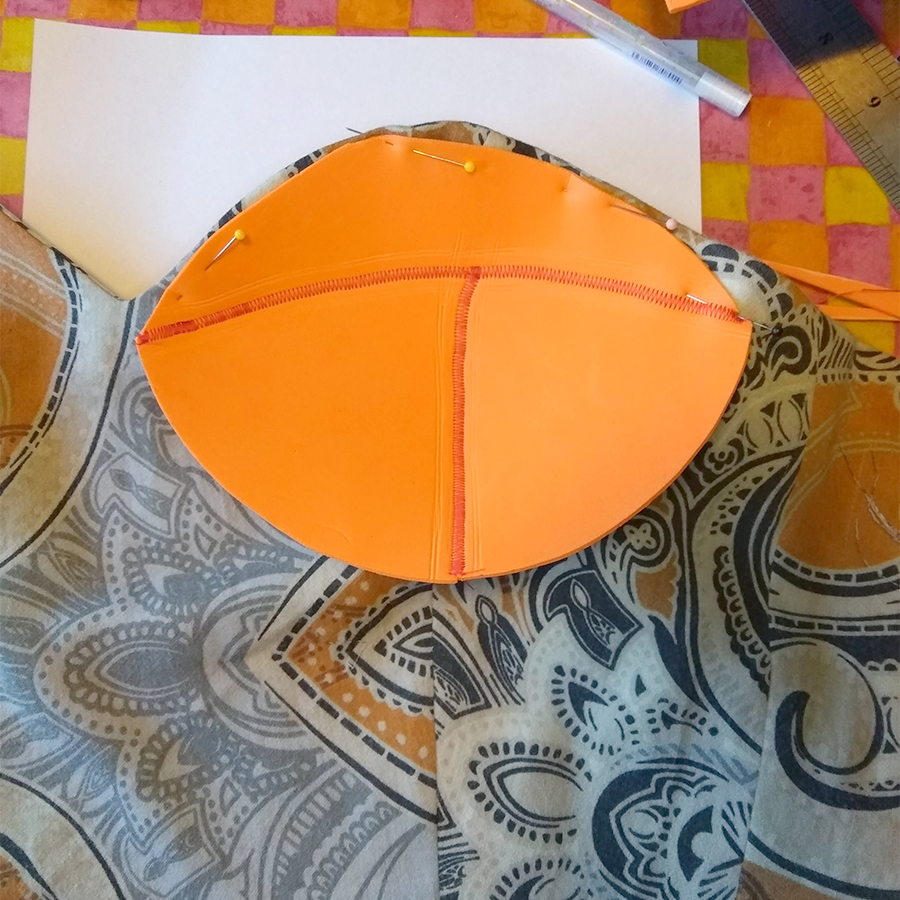
Step 9: Pin
If you’re using this to give shape or support to a bodice or dress, you can now check if it fits to your garment. I pinned the cup to the bodice mockup with the sweetheart (I keep typing “sweatheart”…) neckline to check if the shape was right. And it is!

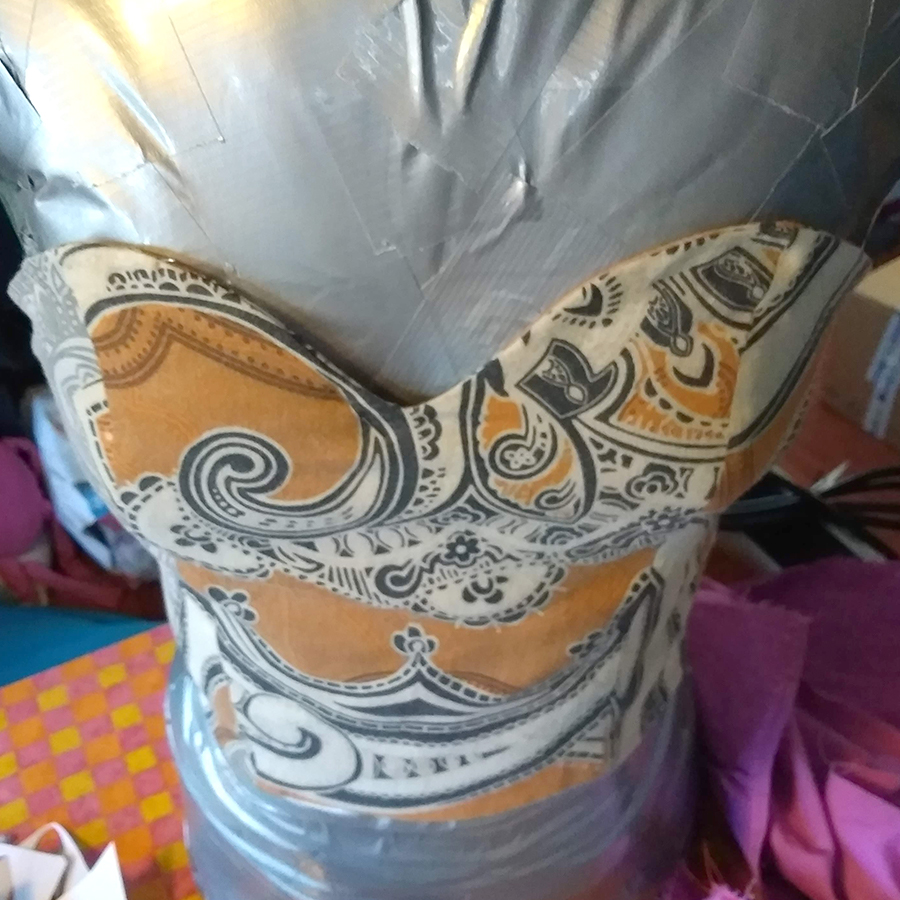
Step 10: Fit again
Now try the cup on again, but with the bodice. If you’re fitting it to your body, be careful of the pins. Maybe tape them first before trying it on. Here I put on the cup on the left side, the right side is the bodice without the cup, looking rather sad.
Ready?
If it all fits well, you’re done! For now at least. You can make the other cup by using the same pattern, but mirrored. Just flip the pieces over. Then you’ll need to sew the cups into the garment eventually. But I’m not at that point yet.
How you’re going attach the cups is completely dependent on your garment and your wishes. You can put the cups inside between the lining and the front fabric, or you can attach them to the lining so they’re directly against your skin. I think I’ll go for the inside the bodice technique, since it works better with this foam. (Like I said before: craft foam isn’t really nice to wear against your skin for a longer period of time.)
Well thanks for sticking around and reading this very long tutorial! Or if you’ve just skipped to the end and just looked at the pictures: that’s cool too. (I actually do that a lot.)
If you have any questions just let me know in the comments. I’ll try to help you out!